Testing

Monday, May 1, 2017

Repairs R Us

It certainly doesn't seem like almost 4 years since I posted last. A lot of things going on and the blogging gets left behind at times.

So we're working on refinancing the house for various reasons. When the appraiser came out to do the inspection there were a couple of areas that were noted as needing attention. I was well aware that these areas needed to be fixed- I just didn't realize how long I've been putting it off!


I picked up the materials I would need and spent the first day priming both sides of the siding panels and all of the trim pieces. If you've ever painted this rough-cut siding with the grooves in it you will appreciate what a pain in the butt it can. Last time I did the garage end of the house, I spent an entire day priming and painting the panels with a brush and roller. This time I approached things a little bit differently- I got one of the airless paint sprayers as a gift for Christmas. That cut my total painting time down by 85%! I love that sprayer :) Once you're used to it, you can cover huge areas effectively in very little time. I highly recommend the sprayer.


First step was to pull the soffit so that I could remove the top panels since they overlap the bottom ones. Then I removed the window. The pic on the right shows the boards I put up inside to keep the cats in while I was working on this. Next, the siding was taken off.

 Same process on the smaller area. You can see where the previous owner simply added additional paneling over the old screen porch to close it in.


New panels in place on both parts of the back area. While I had the bottom pieces of wood off of the area in the pic on the right, I put in flashing and sealed it down solidly to keep rain water from running into the computer room as it had been doing for ages. There is now a single piece of flashing that runs from the cement blocks on the left all the way to the end of the cement on the right. I shouldn't have any water issues for many, many years now.


Replaced the frame on the garage door ( a bit of rot on the bottom edges, so why not fix it now?) and re-installed the window. Framed out the window, caulked and painted it all.


I then reinstalled the soffit, trim, etc. Painted the remaining areas to complete this side.


Next I moved on to the rear of the house. There was one small spot on the bottom right corner under that window which needed replacing. Pulled the old trim board and the offending panel, put in new ones and painted it all. Then entire house is DONE!

I took 4 days off of work to do this project, but things didn't happen the way I planned it. Ended up working on two of those days, but the total time on the project was still only 4 full days working by myself. It's nice to have it completed.

Monday, January 20, 2014

Recliners and pipe dreams.......

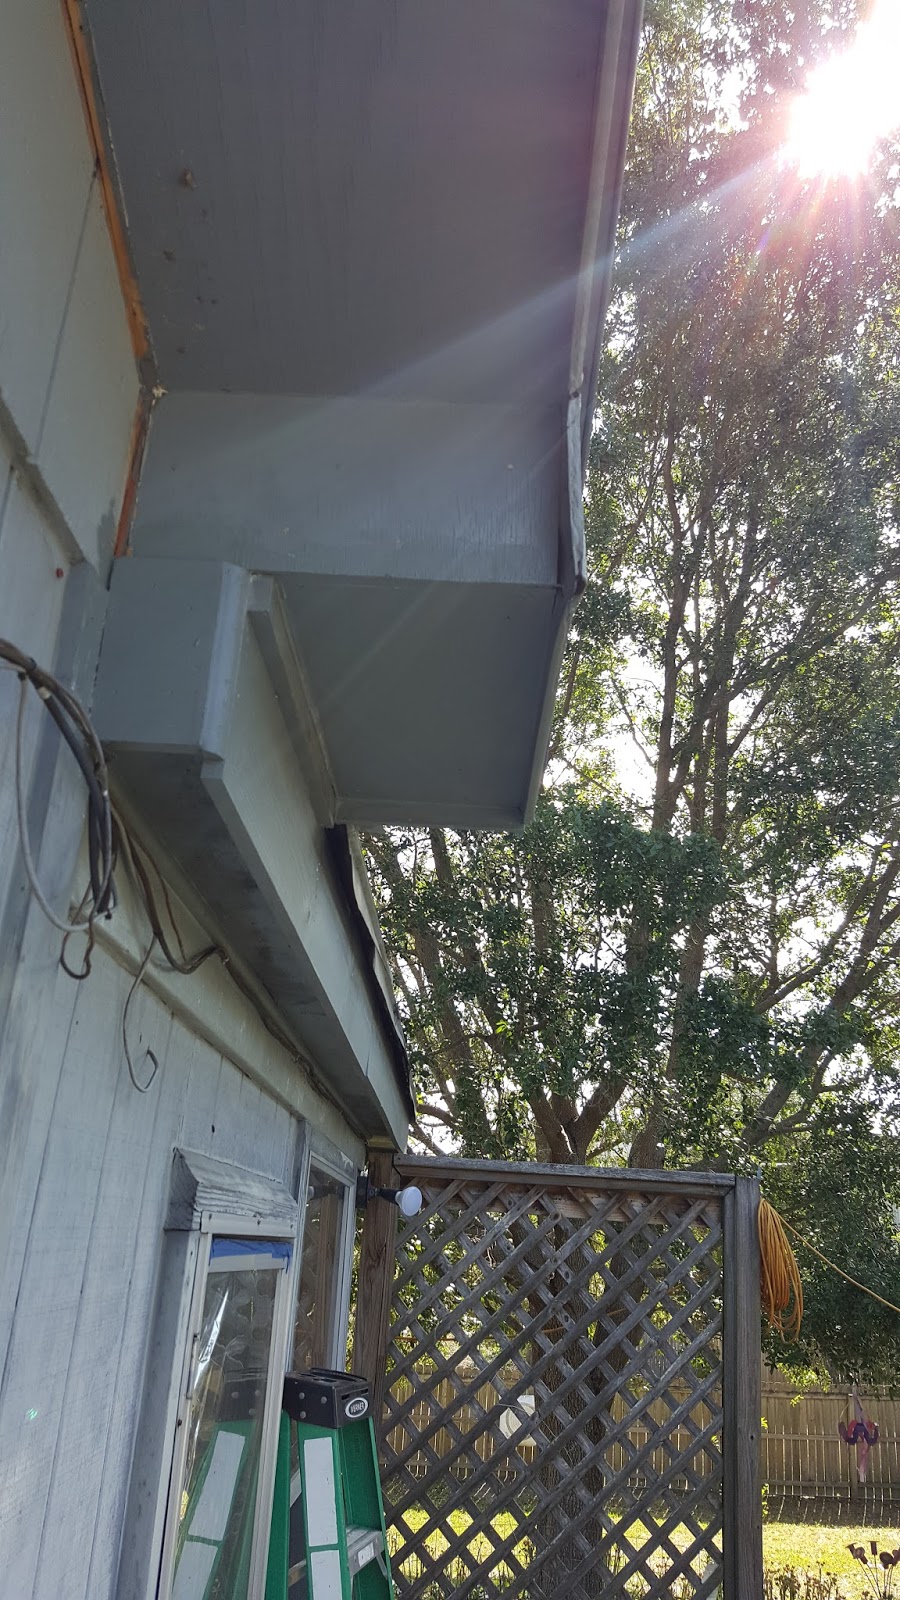
I finally have a moment to breathe, so I'm taking time to catch up on some of the work I've had to do to the house. Last month we had issues with squirrels getting into the attic area and making themselves at home. The were coming in on the back portion of the house that was in pretty bad shape. It took three days, but I got all of that replaced and put together properly. I don't like to beat up on "do-it-yourself" people since I am a very active one of those, but if you're going to do it, do it properly. The back soffits were cobbled together with varying lengths of wood, some of it appearing to be scraps from some previous project. It was just done wrong. A couple of pictures- in one you can still see some of the old stuff:


All of the wood is pressure treated, and after several days of inclement weather all of the bare wood got primed and painted. The rest of it needs to be replaced, but that will wait for another day.

The last two days were spent working on the "gray water" leech field lines. If you've perused the blog at all you might recall that I had issues with that line a while back. That was due to the junction box caving in and allowing dirt into the pipes. I snaked the lines out, then ran a hose through them. I also built a cement lid over the junction box so that if I needed to get to it later I would be able to do so. 

Several days ago I noticed that water was bubbling up from the junction box area. That could only mean one thing- the lines were stopped up again. I removed the cover I made and attempted to snake the lines, but I could only get about 10 feet into one line and 6 feet into the secondary. That did not bode well. The only logical option (in my mind, anyway) at this point was to replace the junction box and run new drain field lines.

I started at the junction box and dug backwards to the holding tank:


The trench looks deceptively shallow in the picture. It is actually between 1 3/4 to 2' deep. That was a ton of dirt to move by shovel. One person. Me. Alone. Not to mention the fact that every other stab with the shovel hit a stone ranging from the size of a fist to the size of a human head. The black corrugated flex pipe was extremely brittle and had breaks all along its length. No wonder the freakin' line was filling with dirt!

I opted to replace it with the white PVC. This gives a smoother surface for the water to flow across and makes it less likely that dirt will accumulate along the length of the pipe if it acquires a break in it.


And in the picture on the top you can see the new junction box. The old box looked like this after I took it out of the ground:


Slight difference, eh? Next step- back fill to the junction box and make things up to that point look nice:


Now the hard part: Making myself do the same thing all over again on the other end of the box. But on this side I had to use the perforated white PVC for the leech portion of the project. And I had to make sure that the gravel foundation was still in good shape so that the water in the line would actually leech out like it's supposed to. I started from the box and dug until I reached the end of the line:


That's another 35 feet at 18-24" deep. One person. Me. Alone. After back-filling the trench I dug out yesterday. I pulled up the old corrugated pipe and found it to be completely full of dirt. I don't mean to the half-way up the pipe point, but the ENTIRE internal area of the pipe! One ten foot section of that pipe weighed (best guess) 300-350 lbs. I was unable to pick it up, I had to drag it out of the hole. (Yeah, yeah, maybe if I hadn't moved the Marianas Trench worth of dirt already, but whatever.)  ;)

I took the hose and washed the dirt off of the gravel that was under the pipe. The water absorbed (leeched) into the ground very quickly which was a good sign. It meant that I didn't have to dig the old gravel out and put in new. After cleaning excess dirt and stone out of the trench, I lined the bottom of it with a double layer of sediment cloth. I then put the pipe in place and wrapped the cloth around it. I held it in place with some duct tape strips until I put dirt on it. Next I put another double layer of sediment cloth on top of the pipe and tucked it down along the sides. Hopefully this will keep the dirt out of the system.


As you might notice, I added a touch or two of my own. Up at the junction box I will have a cleanout pipe flush with the ground and on the final end of the pipe I put a cap so that I could actually open it and flush it out with water if the need ever arises. Also, if I ever have to snake the pipe I have the opening at the end so that I know when I've cleared the entire length of the system. And on to the back-fill:


The junction box is still uncovered, and the pipe sticking out of the clean-out hole will be cut off later. I have to structure a sturdy box around and over the junction box so that it doesn't suffer the same fate as the last one- death by riding mower. That will be done in two days when I have another day off. That will be simple though, the hard part is done.

Total cost: $175.00 and two Advil for my back. Not sure what it would have cost to have someone else come in and do it, but if I had to do this for someone else I'd get at least $2000. I'm figuring I saved a minimum of $1500. Not bad for two day's work :)


Monday, September 23, 2013

The repair saga continues.

I've been moving a section at a time around the house replacing bad paneling and repairing things as needed to bring the house back into shape. I've also been painting as I go so that the house looks like it should.

It's not the wife's fault that things are as bad as they are- she's not a handyman and she really had no assistance with anything of this nature until I arrived on the scene. Progress is being made and I enjoy working on tasks such as this, especially considering what it would cost to have someone else do it.

Have I mentioned that I hate paying someone to do things I can do?  ;)

The garage side of the house is the last one that could be seen from the street which hadn't been worked on yet. This was due to the fact that it was in the LEAST bad shape. I actually did an area on the back of the house because things there were so bad I didn't feel comfortable waiting any longer. But the next door neighbor has been having her house roofed and painted and considering that the garage side faces her house I decided to take care of  it this past weekend.

So it started out looking like this:

If you will notice, the cardboard that was used for the "wings" (as I call them, not sure what the actual term is) was rotten and wavy, so I started by replacing both of those with plywood. That would be the unpainted plywood piece that you can see in the top left of the picture above. I replaced the right one as well. Those trim boards and wings are cut out of one long piece of cardboard, so I took my oscillating too and cut out the old stuff and made new to replace it using templates that I had traced earlier. Oscillating tools are awesome for this kind of thing! I refer to the trim as cardboard because it's not even pressboard. It's more along the lines of cardboard fibers bonded together rather than actual wood chips like you find in pressboard. Probably a lot cheaper, but I've been using actual wood when it needs to be replaced.

Here's a better shot of the wing:


In the first picture you can see the holes and peeling layers of the plywood (especially noticeable under the window). There were actually 4 full sheets that needed to be replaced. 

Next task was to pull the window and the old wood off of the house. Then I cleaned out between the studs and put backing on several largish holes in the sheet rock so that I can patch them properly from the inside once I am done with the outside. I replaced the pipe belonging to the hose bib (made it longer and it was rusting on the inside anyway) and put a new faucet on the pipe.

Now for the fun part- putting new wood in place. While it may seem a rather straight-forward task you need to realize that each piece of wood slides UNDER the one above it, the interlocks with the one on each side of it. So there are three joints to work with. Not bad if you're putting it up as new construction, but a true pain-in-the-ass to do it as re-work. By myself. Alone.

By the end of the second day my muscles were so tired that I seriously had trouble carrying my tools to put them back where they go. But the work got done :)

A shot of the new panels in place:

Thank the powers that be for nail guns. I'd be two more weekends getting this done if I had to drive all of the nails by hand! But the nail gun can be picky. You can set it to a general pressure that works for most situations or you can spend loads of time adjusting the thing to drive the nails in just right. I leave it on the generally setting which countersinks the nails just a bit and then I putty over the nail heads before painting (as shown below). This keeps the nails from popping out and rusting like they will if you just drive them flush and paint them.


The remainder of the day after applying the putty to the nails was used painting the stripes between the "boards" on the plywood. Note: Before putting the wood on the house I primed both sides and all of the edges with a good primer. That served two purposes- 1) It keeps the wood from warping as it will when only one side is painted, and 2) It beats the hell out of rolling and brushing the primer on in a vertical situation. Priming the edges also keeps the wood from rotting as fast at the bottom once it's installed.

The next day after work I painted all of the siding. It went rather quickly since I was now using a roller and all of the trim painting had been done the day before. I didn't bother painting inside of the marks I had for the window opening:


If you look closely you can see the holes I drilled in the corners of the window layout so I could redraw the lines and cut out the opening with a minimum of fuss. Next part of the project was re-installing the vent cover and the window. I simply drew lines to the edges of each hole, set my saw to the depth of the plywood, and cut the excess away with no issues. After cleaning up the window and putting some flashing into the opening I installed and sealed it:


I cut, primed, and painted the trim boards for the right edge of the house and around the window. The following day I installed the remaining trim and put the fence panel back into place:


Mission accomplished! I spent a total of $250 on paint and materials and I probably saved between $600-$1200 in the labor costs. 


Sunday, June 30, 2013

An Electric Tool Box

Not long after I bought my truck, I purchased a tool box to mount in the bed. I thought the box was pretty cool because you could open it from either side without climbing into the back of the truck. 

Lately I've been having trouble opening the box from the driver's side (which is used the most) and it finally reached the point where it could only be opened from the passenger side of the truck. 

Why would that be a hassle? Well, if you are asking that question you've never had a toolbox for the back of your pickup truck. You see, once you get your tools where you want them it simply does not work to move them to another spot. If you do that, you can't find anything ever again. Ever. Kind of like the sock-eating-dryer thing. Either put them where they go or give them away. Same end result.

I tried swapping the locks on either side of the truck, but that didn't change anything. So I took a close look at how the mechanism that operates the single rod from both sides works. After several years there is some wear on the moving parts of the latch system. Apparently the "open either side" part only works within very strict tolerances, and the worn areas are not allowing the driver side lock to do what it needs to do, since it's on the "complicated" leg of the mechanism. There is no feasible way to turn the entire setup around so that the driver side would be the simple side.

I'm really not sure what an entirely new mechanism would cost- I didn't bother pricing it. I made life simpler with a bit of creativity :)

I went to AllElectronics.com and purchased a lock solenoid for $6. I ran a wire to a small switch I put in the dashboard and to power. I then made a mounting bracket from a piece of aluminum angle I had in the scrap bucket. Drilled a couple of holes, shaped the actuator rod how I wanted it, hooked up a switch, power and tested it out. It works like a charm! 

My next order through All Electronics will include a switch that's operated with a key. I'll replace the driver side lock with the key switch so I can open the box from the driver's side without unlocking my doors.

Here's a picture of the mostly-finished setup:


I still have to tie down the wires and clean it all up, but it works! Total cost estimate (even with the switch I want to order) is $12. And it still opens from the passenger side with the key, so if the battery is dead I can get in that way.

I really enjoy doing this kind of stuff :)


Wednesday, June 12, 2013

A door has opened :)

Quite a few years ago, when I first visited the house we live in now, I noticed that the sliding glass door leading into the computer room was not working so well. According to my lovely wife, it had been making the awful squeaking noises for a long time before I was around. The first time I took the door apart I noticed that the rollers on the most-used door had locked up and were cutting into the aluminum track that the doors roll on. I purchased new rollers (about $16 for two of them) and installed them into the offending door. This made the sliding action easier for a while, until the track wore completely through in areas causing the bottom of the door to drag. The constant sliding of metal on metal totally destroyed the rollers I put in and was actually beginning to wear away the bottom edges of the door.

The track depth is supposed to look like this:


And it was now looking like this:


So I called several door companies to see what it would cost to replace the track strip for the doors. Guess what? They don't replace tracks- they only install ENTIRELY NEW DOORS AND FRAMES. I could find no one at all that would  be willing to replace the bottom track. I even tried some handyman services, with the same results.

My next course of action was to scour the internet for door tracks that I could purchase and put in. There was not a single site found that could supply the track with the measurements I needed. (Distance between the rails that the doors roll on, height of the rails, shape of the rail, etc. You'd be surprised how many different types of rails you CAN find, but it's unlikely that any of them will fit the doors you currently have.)

So I drove to a local hardware store and talked to one of the old-timers. He told me that I could try a "rail cover" that some people use to bolster worn rails. It's basically a stainless steel cap that you place over the top of the rail. It doesn't work. The weight of the door causes the cap to bend at ANY point that isn't perfect on the rail. That totally defeats the purpose of the cap, you know? So that ended up warping and getting tangled in the bottom of the door. An effort in futility.

I waited another two years and when things reached a point where you had to pick the door up and move it instead of sliding it I decided to make a last ditch effort to fix the damned thing before spending the exorbitant amount they would likely ask to install a new set of doors and rails.

I went to a local steel yard that sells to the public and bought a strip of 1"x 1/8" flatbar, and a strip of 1/4"x1/4"x1/8" angle iron. I had to buy 20 foot strips of each since that was the minimum they would sell, but the total amount spent was on $18. I measured the set-back of the rail from the baseboard and tack-welded the angle iron to the flatbar using that measurement. This gave me a steel rail that matched the height of the aluminum rail needing to be replaced.

It looked like this (a short piece I had after I trimmed it to length):


And here you can see how I tack-welded every 8" or so on opposing sides:


I then cut out the damaged railing and inserted the iron rail under the edges of the remaining rail like this:

You can see that I tucked it in. I did this by loosening the screws holding the original to the threshold, sliding the new piece under it, and tightening them down again. This served to keep it in place and lined up with the original undamaged part farther down the track. I could have replaced the entire inside strip, but cutting the aluminum where it wasn't damaged is a pain in the butt. A grinder will gall up, the rail is on concrete so a hacksaw isn't feasible, and a rotozip  in this restricted area is not going to allow a straight cut that is needed. I used one of the oscillating tools that let you cut flush to almost anything. I used a fine-toothed wood attachment and a slow and steady approach to get a nice, straight cut so I could remove the bad material. It makes a lot of noise, but it's very effective.

After installing the new piece of fabricated track and screwing everything back down:


I bought new rollers to put on the door while I had it down ($16 for two) and reassembled everything.

It. is. awesome. You can slide the door open and closed with one finger now, and my total expense was right at $34! The steel rail will last longer than the door, and I still have enough material to replace the outside rail if I need to.

Take THAT, sliding glass door people!!! Bahahahahahahaha!!!

Monday, November 12, 2012

Efforts in metallurgy :)

Today I finally took a bit of time to try casting aluminum. It was not quite what I expected :)

I built a smelter of sorts out of scrap a while back-


 I obtained a can and put a handle on it:


I added charcoal and aluminum cans then fired it up. The pipe you see coming out of the bottom is actually a piece of tailpipe obtained for free from a muffler shop. I just went in and asked for a scrap piece and offered to pay them something for it but they just laughed and gave it to me at no cost. It's supposed to be used to push air through holes drilled around where the can sits to make the fire hot enough to melt the aluminum.


According to youtube you're supposed to put a hair dryer on "cold" setting into the pipe for proper air flow. I picked up a cheap hair dryer from Wally World and took it apart, then removed the heating elements because it didn't have a "cold" setting. Only hot and hotter. It refused to work. Upon closer inspection I realized that if the heating element was broken the circuitry refused to power the dryer (which makes sense in the normal use of the thing) but this did nothing for my efforts to have forced air. So I rewired the thing and plugged it in to promptly get a grand display of sparks and a tripped breaker. Screw the hair dryer.... I have better weapons in my arsenal :)


I hooked up the shop-vac on the "blow" side of things and used that instead of the hair dryer. Let me tell you- it worked fabulously! Originally I had the can sitting in the middle of the fire. This is a view after I had poured my first "ingot". The majority of the crap you see left in the can is slag or "dross" (which is a fancy word for stuff that's not pure aluminum.) You're supposed to lift the dross off of the top of the melted aluminum but the melting vessel I used is really too small to get into with the spoon once you take the heat factor into consideration, so I left it there. I just poured the melted aluminum and let it run from below the slag into the ingot mould that I made.


Below you see my efforts at an ingot. I would have done more but I was running out of fire/charcoal so I got what I could with the materials I had on hand. This is two separate pours. I poured the first, re-positioned the can, allowed more aluminum to melt and then made the second pour.


 All-in-all it was a fun experience. I'm going to add a stand into the bottom of the smelter to allow the can to sit up off of the steel plate so that the bottom isn't conducting heat away from the aluminum. I'm also going to get wood for fuel instead of charcoal. The charcoal worked fine, but it took an entire bag to do this little bit and at $9 a freakin' bag it would be simpler to buy a couple of pounds of aluminum, ya know?  The shop vac on "blow" worked great, but I'm going to use an old vacuum cleaner motor set to blow next time I do this.

Now I just have to figure out a how they make proper moulds so that I can possible create something useful with this new technology :)


Thursday, August 23, 2012

Gotcha! Bahahahahaha!!!!

        I was out in the yard last week doing some lawn work when a guy walks up and asks me if I would be interested in getting a free estimate in regards to replacing my roof. Considering the condition of the roof at this point, I'd LOVE to know how much it would cost to have someone replace as opposed to buying the materials and doing it on my own. So of course, I said yes.

        Next, he asked me when I would be available for someone to come over and give an estimate. I was off on the following Monday, so I told him to have someone come by around 10am. He then asked if my wife would be home, to which I replied no. That was an odd question, in my mind. So I tucked a little red flag next to this guy's memory spot in my brain. He then proceeded to ask what time my wife would be home and I asked him WHY? He stated that often when they gave estimates they would need input on shingle color, etc. so it was easier to have both parties present when they came out. It still sounded a bit odd, but I made arrangements for them to come out between 6pm and 7pm to give me the estimate and assured them that my wife would be home but had no wish to interact with them in any way. The guy got his boss on the speaker phone, the appointment was confirmed, and we were set to go.

        Monday comes, 7pm flies by and still no roof guy to give me an estimate. Another red flag planted next to his memory spot. Wednesday rolls around and I get a call from the roofing company asking how my appointment went on Monday. I then told the man that there WAS no appointment because his guy never showed up. I let him know that we waited on dinner so that I could be outside while he was supposed to be here and also that I felt extremely inconvenienced because no one showed up or called to say why they never came. The man on the phone apologized and said "let me check my notes" after which he said "They came by and no one was home, so they left a card". I got a bit rude at this point. I let him know that I was off on Monday, I was home ALL day, and the only card I had was the one the original shyster had given to me. Then I let him know I had serious doubts about doing business with his company because if they didn't have the integrity to show up for the appointment to get my business in the first place, what were they going to do when they got some of my money? Fail to show at all? HA! Not with this kid! He apologized profusely and pleaded with me to let him arrange another appointment all the while assuring me that he would expedite this situation to the owner of the company for a resolution.

        Now keep in mind that I really want to know what a roofing company would charge to come out and replace the roof. That's all I really need to know- is it worth it to pay someone for the labor I would have to expend over the course of a week or two?

       Which brings us to today. After agreeing to allow them to come out and give an estimate, a guy pulls up in an SUV. I went out to meet him, all the while counting the red flags by this company's memory spot. Yep, three so far. While he was getting his folding ladder out he asked a few questions, I answered, and we chatted about the current condition of the roof. Then he says "when I'm done, we'll go inside and discuss the estimate" to which I replied "my wife is not interested in speaking to anyone". He then tells me that he has to read the "insurance mitigation clause" to both parties involved with the home. I asked him what insurance had to do with anything and he told me that homeowner's would give us 31% per year off of our homeowner's premiums with a hurricane rated roof. So I asked (with innocence in my voice, if you can imagine that from me) "when did insurance companies start giving discounts for home maintenance"? He says " Oh, no... only for HURRICANE rated roofs". (insert red flag #4) It seems that he wanted to install a super-special-hurricane-driven water-proof-roof on the house and would have to document every step of the process for the insurance company so that we would get our discount. (red flag #5)

        So my next question was "how MUCH MORE is this hurricane roof compared to a conventional roof?" to which he replied "25-30%, but you save that in insurance premiums!". Hah! Yeah, right. So I informed the little man that I only wanted my free estimate to encompass normal roof replacement. He got surly and asked me why I didn't state that when I made the appointment. I got just as surly (perhaps just a weeeee bit more) with my reply of "why didn't your guy tell me what he was really trying to sell?".  He was not a happy camper. He said he couldn't give me an estimate for a normal roof, packed his little ladder, and scooted his sorry self off of the property.  It's not like I was going to do business with them anyway after the way the initial appointment was handled :)

        I could tell that he was miffed about driving out, unpacking his ladder and finding out that he had nothing I wanted. Yeah, buddy..... karma is a bitch. You should have kept the first appointment- I can be a really nice guy when I'm treated with respect :)